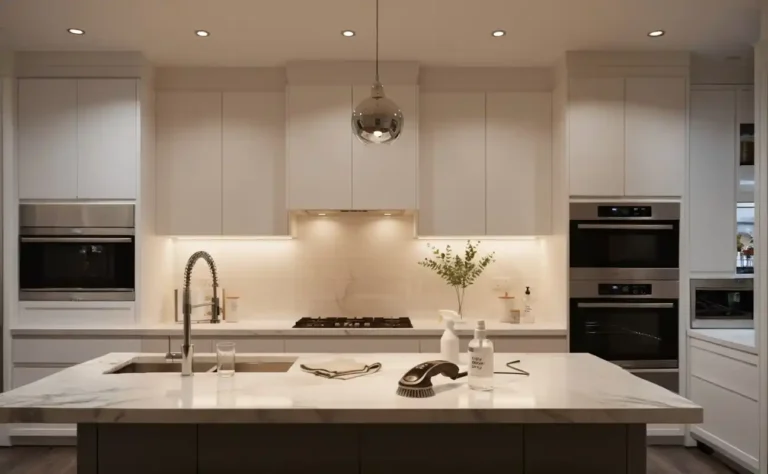
15 Kitchen Organization Ideas That Will Change Your Life (in the Best Way)
Let’s be honest: a chaotic kitchen kills the vibe. You know that moment when you open a cabinet and something attacks you? Yeah, we’re fixing that. These 15 kitchen organization ideas are simple, stylish, and seriously life-changing. You’ll cook more, clean less, and maybe even enjoy doing dishes. Maybe.
1. Declutter Like a Ruthless Editor
Before you buy another cute container, cut the clutter. If you haven’t used that spiralizer since 2014, it’s time to say goodbye.
Quick Wins
- One drawer at a time: Don’t overwhelm yourself. Set a 15-minute timer.
- Keep only what earns its spot: If it’s not used weekly or seasonally, donate.
- Duplicates are sneaky: Do you really need four bottle openers? Didn’t think so.
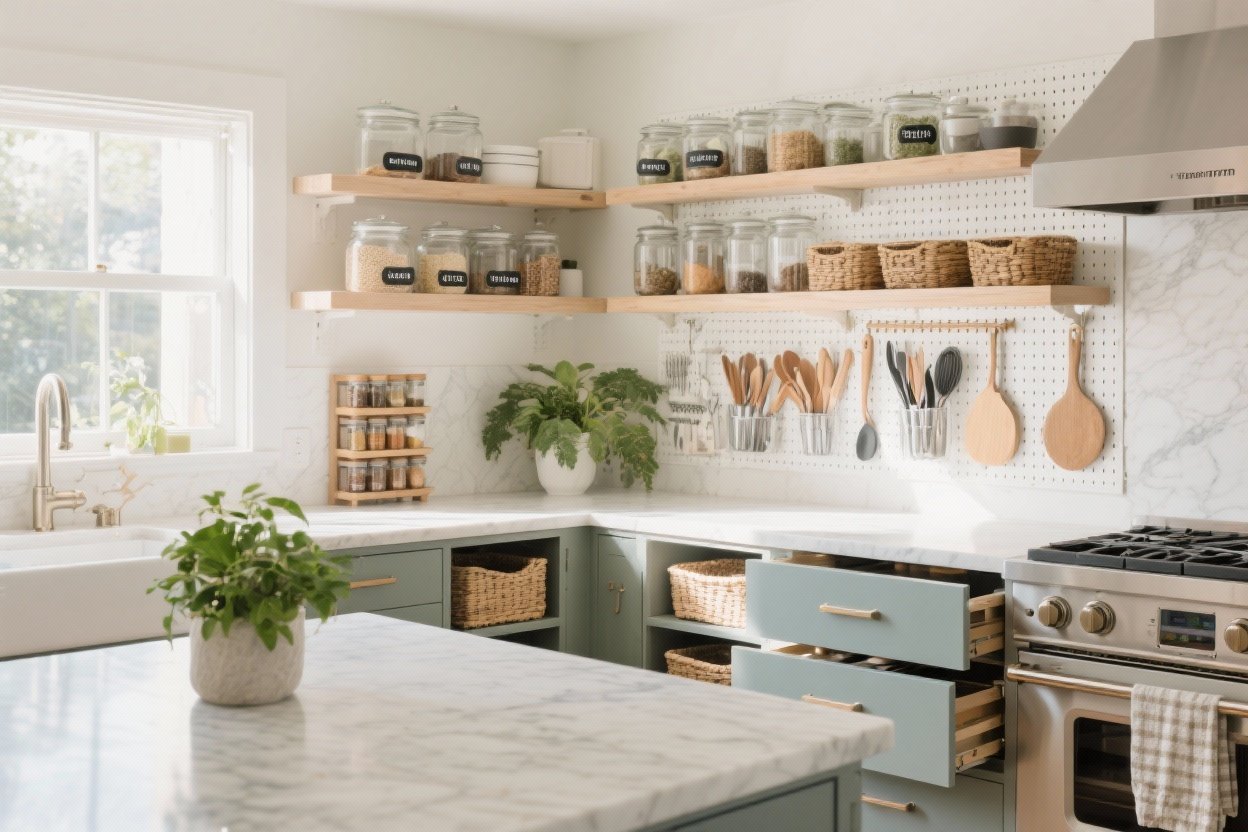
2. Zone Your Kitchen Like a Grocery Store
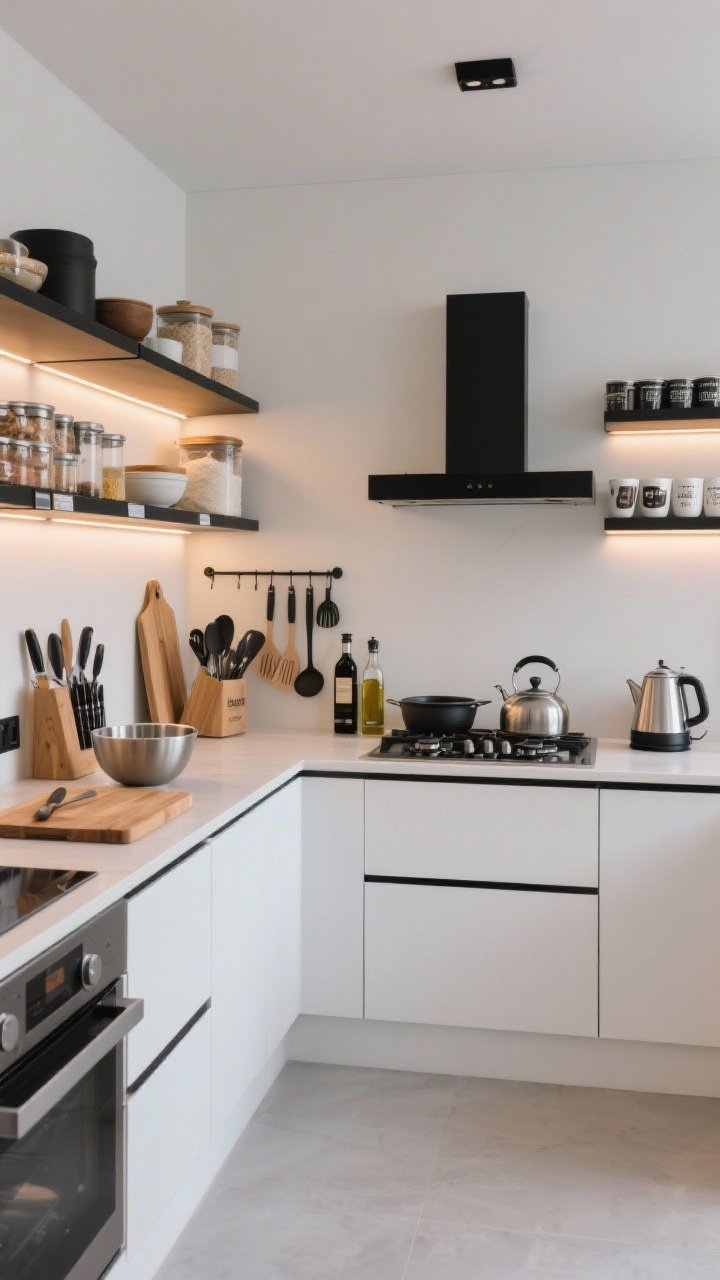
Think in zones. When everything has a home, cooking becomes automatic. No more sprinting across the kitchen for a whisk.
Make These Zones
- Prep zone: Cutting boards, knives, bowls near your main counter.
- Cooking zone: Pots, pans, oils, and spatulas near the stove.
- Baking zone: Mixing tools, flour, sugar close together.
- Coffee/tea zone: Mugs, pods, kettle, and sweeteners in one spot.
3. Embrace Clear Containers (Label Everything)
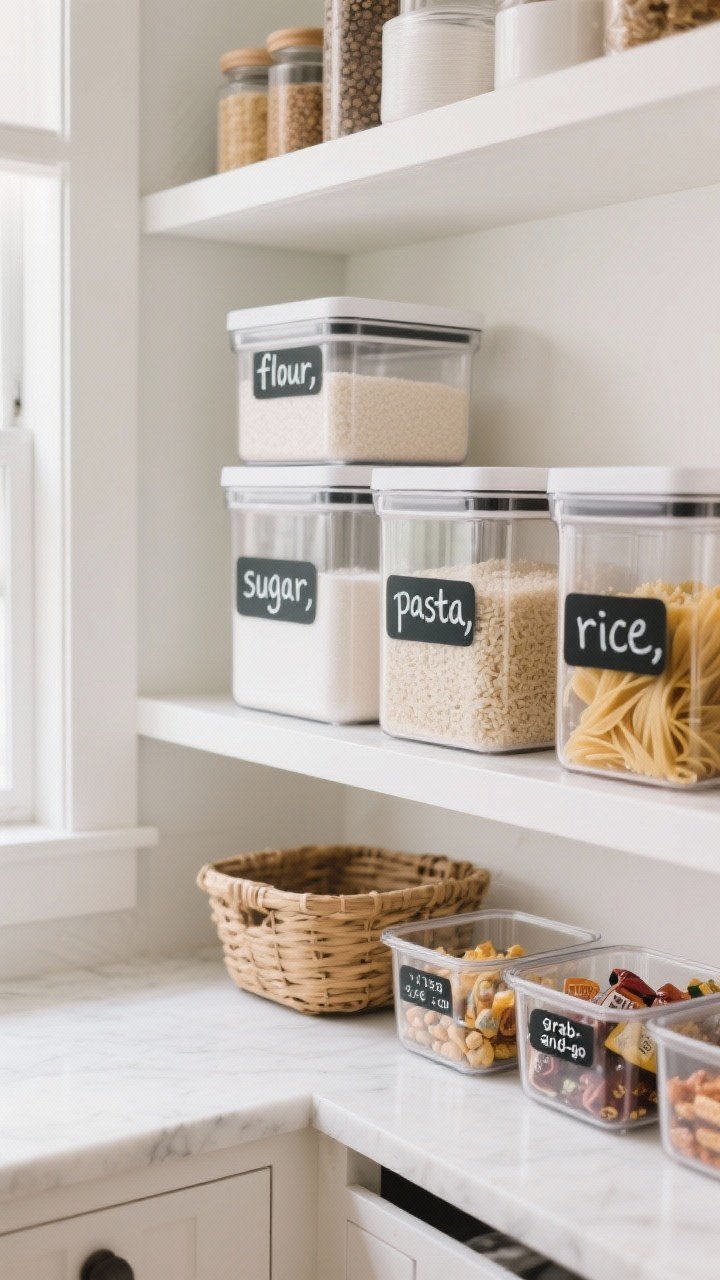
Clear bins are your new besties. You see what you have, you stop buying duplicates, and your pantry looks like a makeover show.
- Use stackable containers: Especially for flour, sugar, pasta, rice.
- Label clearly: Contents + date opened. A chalk marker is handy, FYI.
- Small bins for snacks: Create snack bins for kids and a “grab-and-go” basket.
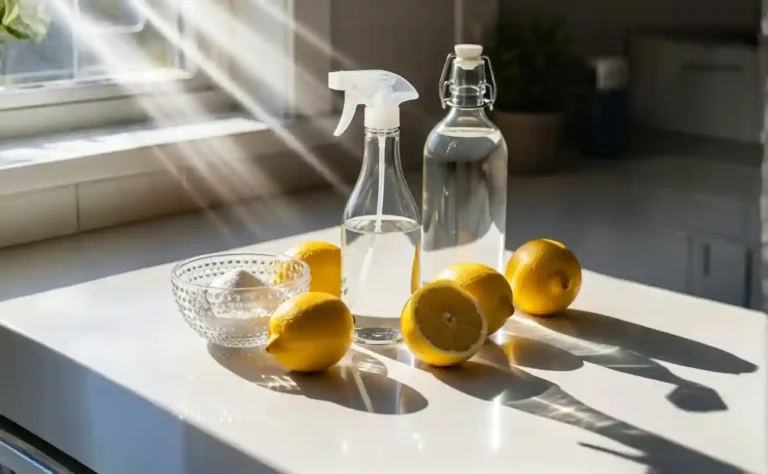
4. Decant Smart, Not Just for the Aesthetic
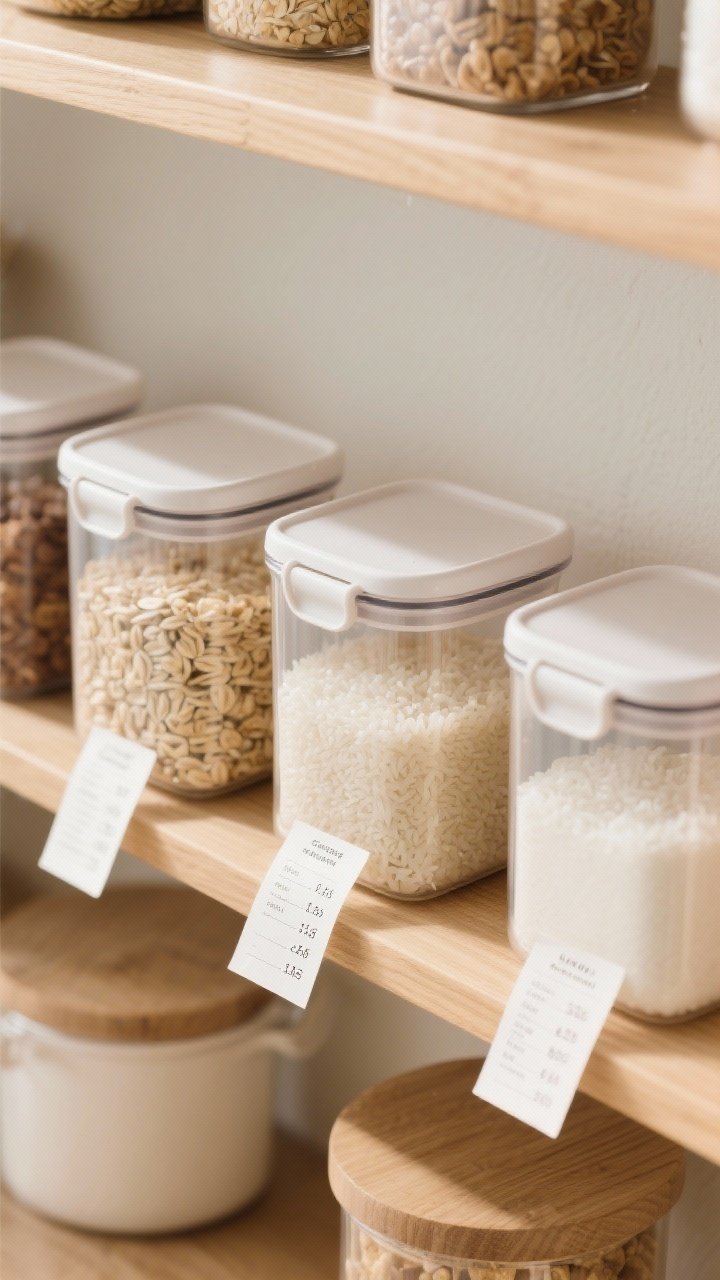
Decanting isn’t just for Instagram. It reduces packaging bulk and keeps food fresher. But be strategic.
- Decant only the staples: Think oats, rice, cereal, baking basics.
- Keep instructions: Tape cooking times or recipes to the bottom of containers.
- Use airtight lids: This is non-negotiable if you want to avoid stale sadness.
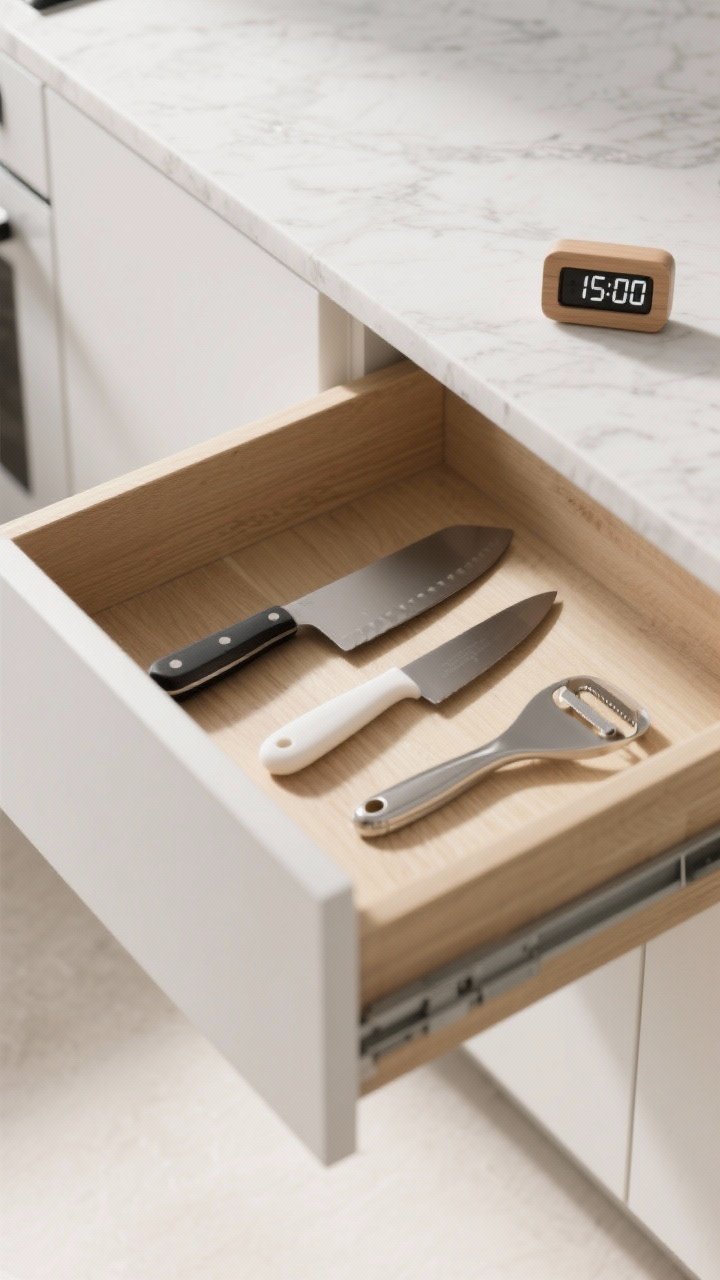
5. Master the Magic of Drawer Dividers
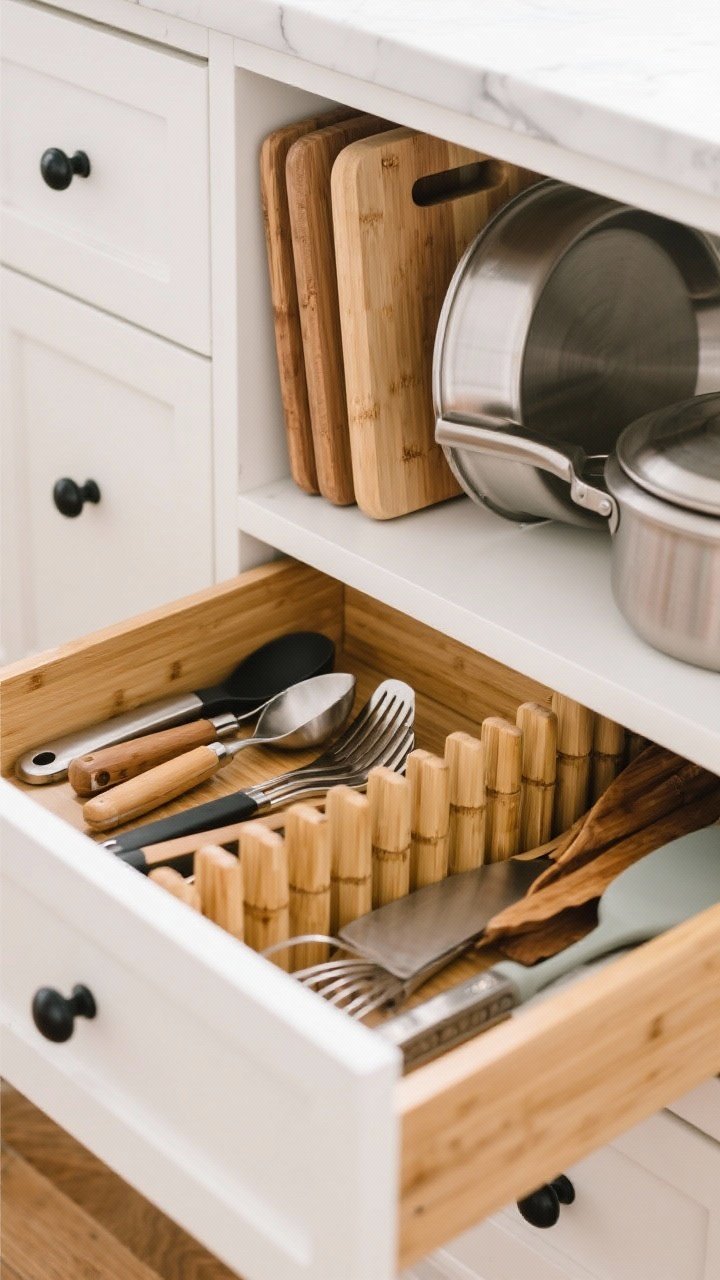
Utensil drawers get chaotic fast. Dividers turn that wild junk drawer into a civilized space.
- Expandable bamboo dividers: Fit almost any drawer, look chic.
- File your cutting boards and lids: Use upright dividers for easy grabs.
- Segment by task: Baking tools in one section, everyday tools in another.
6. Install Pull-Outs and Lazy Susans
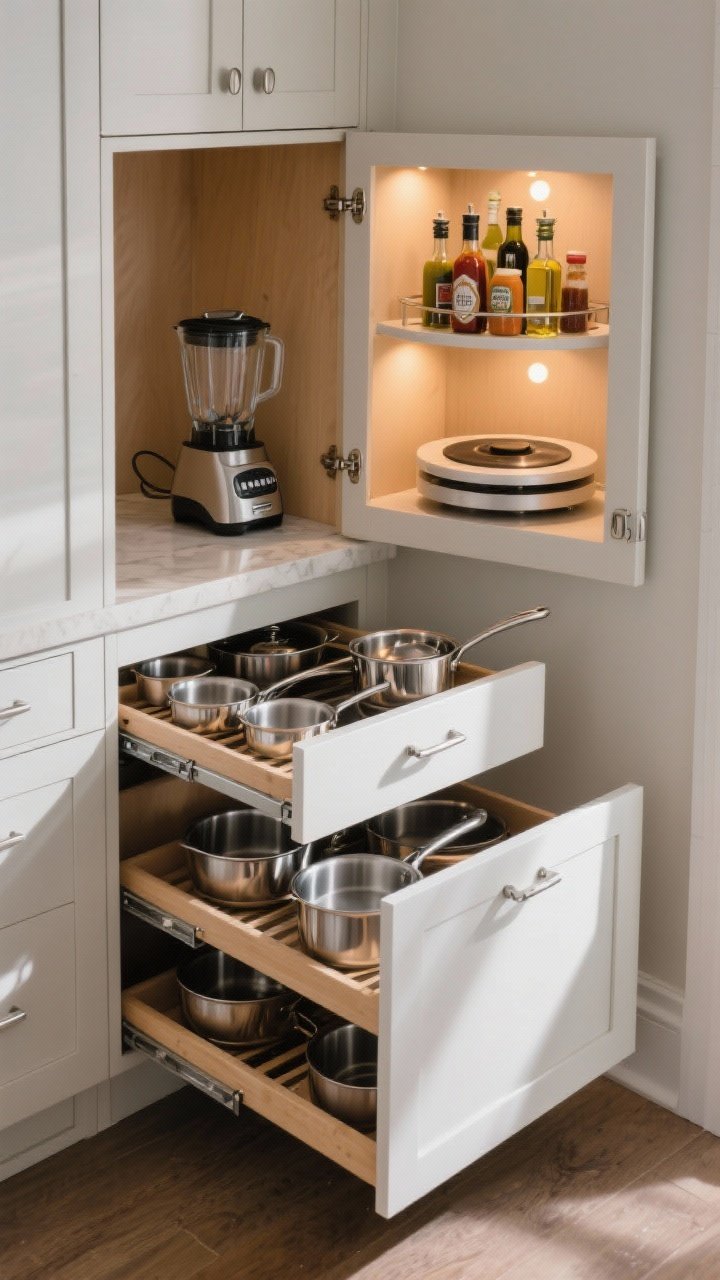
If you can’t see it, you won’t use it. Pull-out shelves and lazy susans make deep cabinets functional again.
- Pull-out trays: Great for pots, pans, and small appliances.
- Lazy susans: Use in corners for oils, sauces, or spices.
- Double-decker turntables: Max out vertical space without digging.
7. Elevate with Shelf Risers
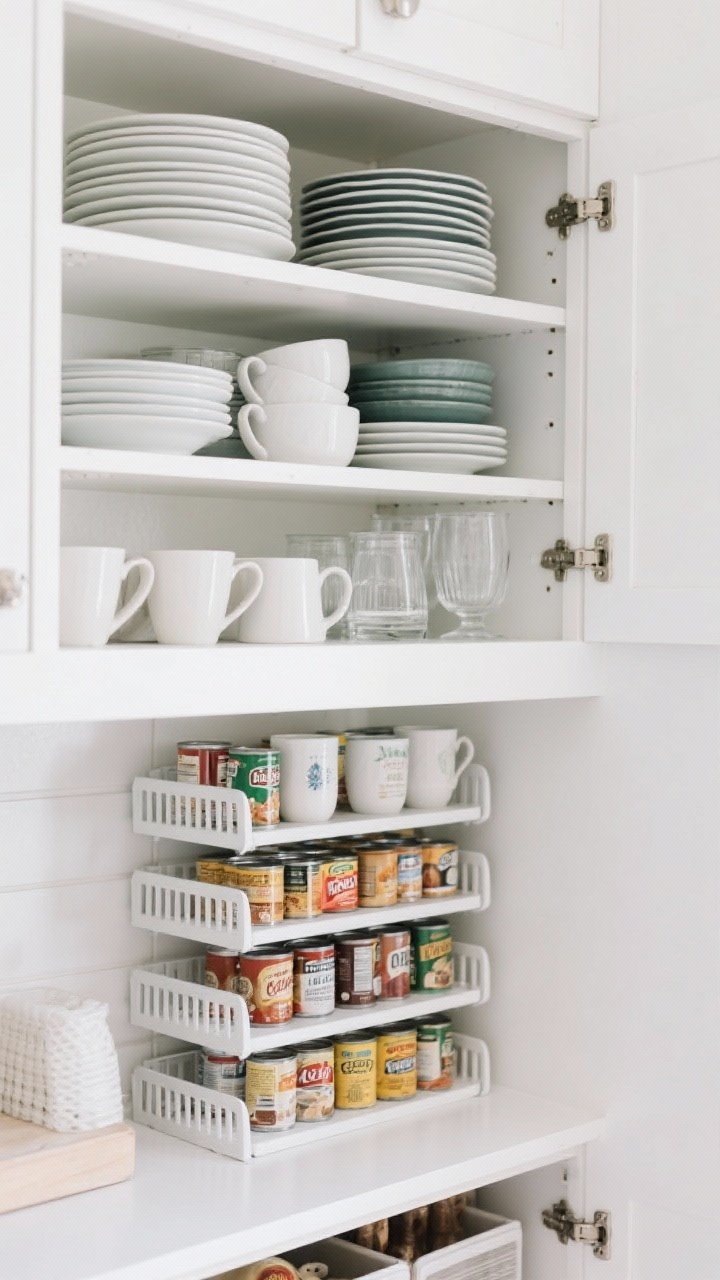
You’ve got vertical space—use it. Shelf risers double your storage without adding a single cabinet.
- Plates and bowls: Stack by size on risers for a boutique look.
- Mugs and glasses: Keep everyday items on the lower tier for easy reach.
- Pantry cans: Tiered risers mean you can actually see what you own.
8. Use the Inside of Doors (It’s Prime Real Estate)
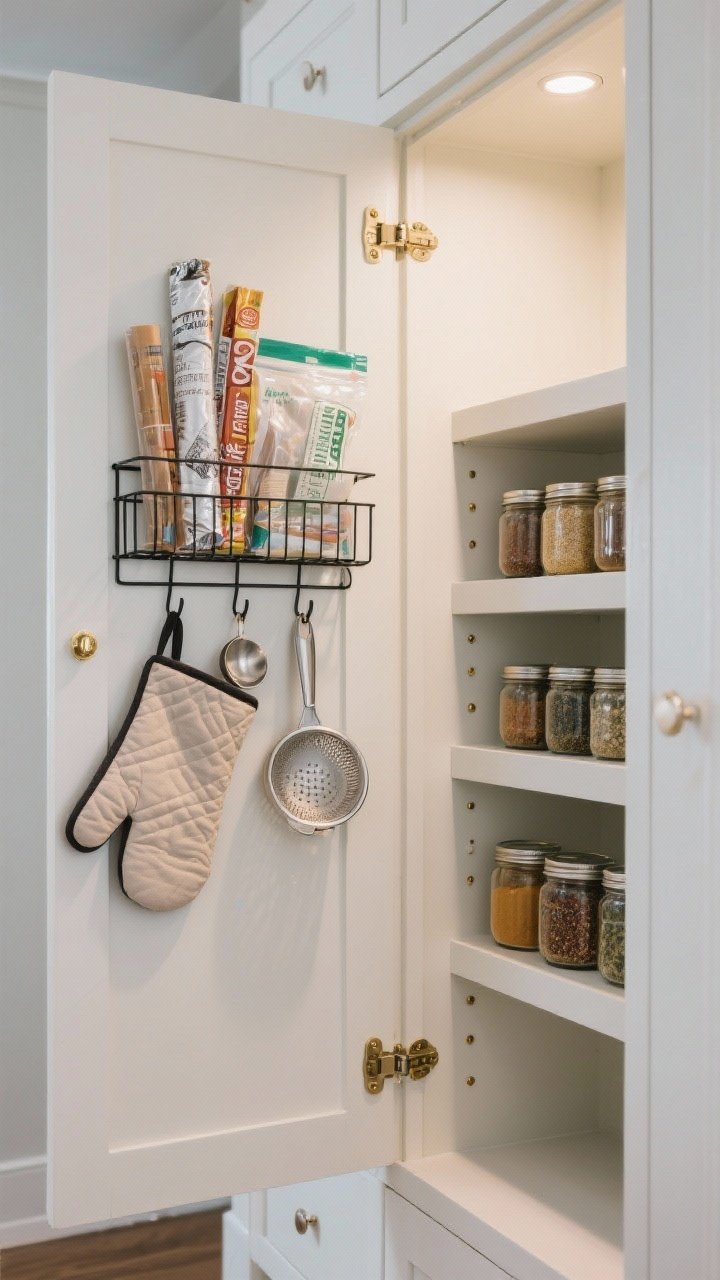
Doors aren’t just for slamming when you burn toast. They’re secret storage gold.
- Adhesive hooks: Hang measuring spoons, oven mitts, and small strainers.
- Over-the-door racks: Ideal for wraps, foils, and zip bags.
- Spice racks on cabinet doors: Just measure jar height to avoid collisions.
9. Create a Commanding Coffee Station
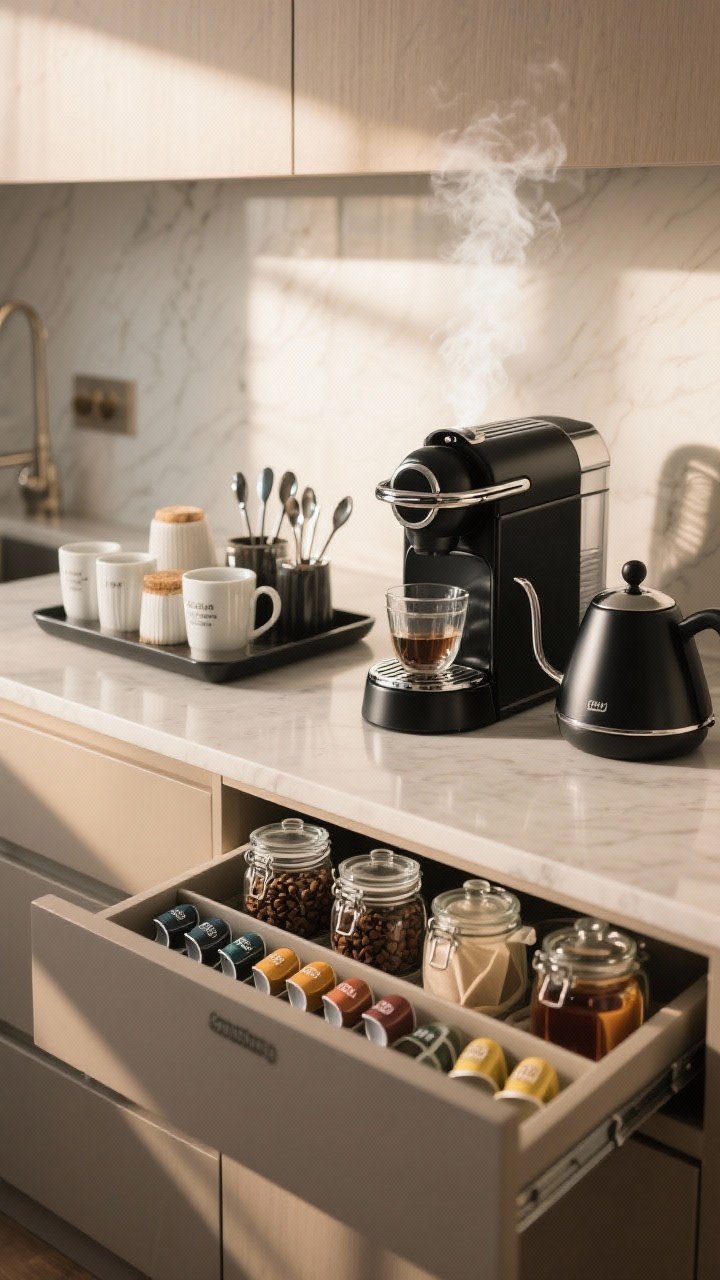
Morning chaos? Not on our watch. A dedicated coffee/tea zone saves time and looks intentional.
- Corral it: Use a tray to hold the machine, mugs, sugars, and spoons.
- Drawer organizer for pods/tea: Sort by flavor because you’re fancy now.
- Label jars: Beans, filters, syrups—no more 6 a.m. scavenger hunt.
10. Hang, Don’t Stack: Walls and Ceilings Count
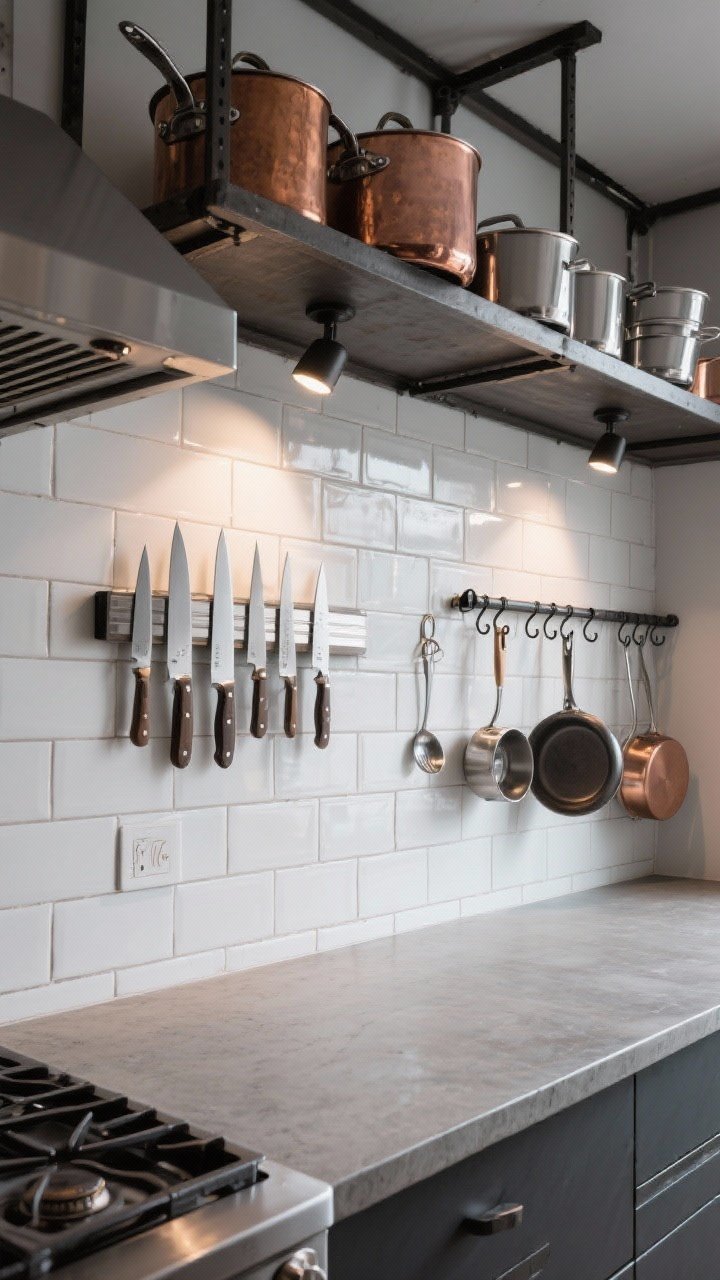
When counter space is scarce, go vertical. It also makes your kitchen look chef-level legit.
- Magnetic knife strip: Safer than a drawer, sleeker than a bulky block.
- Mounted rail with S-hooks: Hang ladles, tongs, and small pans.
- Pot rack: If you’ve got the ceiling height, it’s both art and storage.
11. Tame the Tupperware (The Chaos Ends Now)
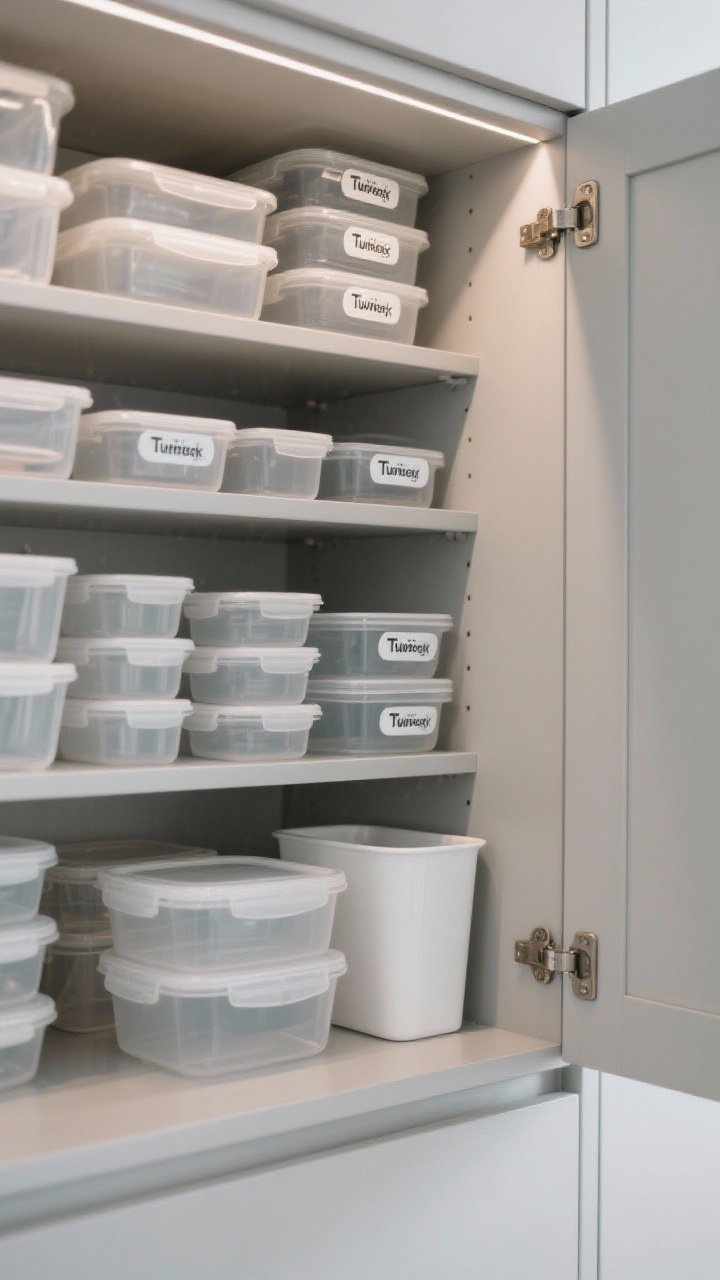
Food storage containers are notorious troublemakers. Let’s put them in their place—literally.
- Nest by size: Keep lids upright in a small bin or lid organizer.
- Stick to one brand or shape: Uniform sizes stack better and save sanity.
- No orphan policy: If a container has no lid or vice versa, it’s out. Sorry, not sorry.
12. Decisive Spice Strategy (So You Can Actually Find Cumin)
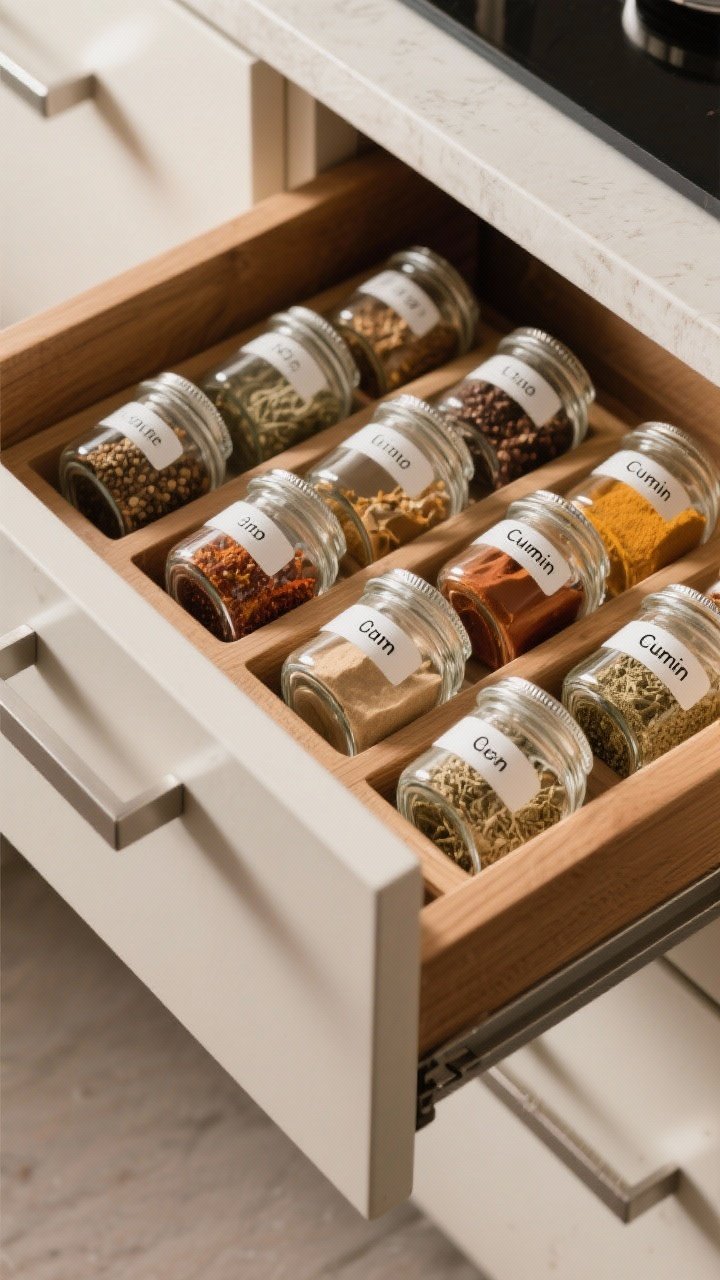
Spices expire. Spices hide. Spices multiply. Time to take control.
- Choose a system: Drawer with angled inserts, tiered shelf, or door rack.
- Uniform jars with labels: Looks clean and speeds up cooking.
- Alphabetize or group by cuisine: Do what your brain understands best, IMO.
13. Give Appliances a Home Base
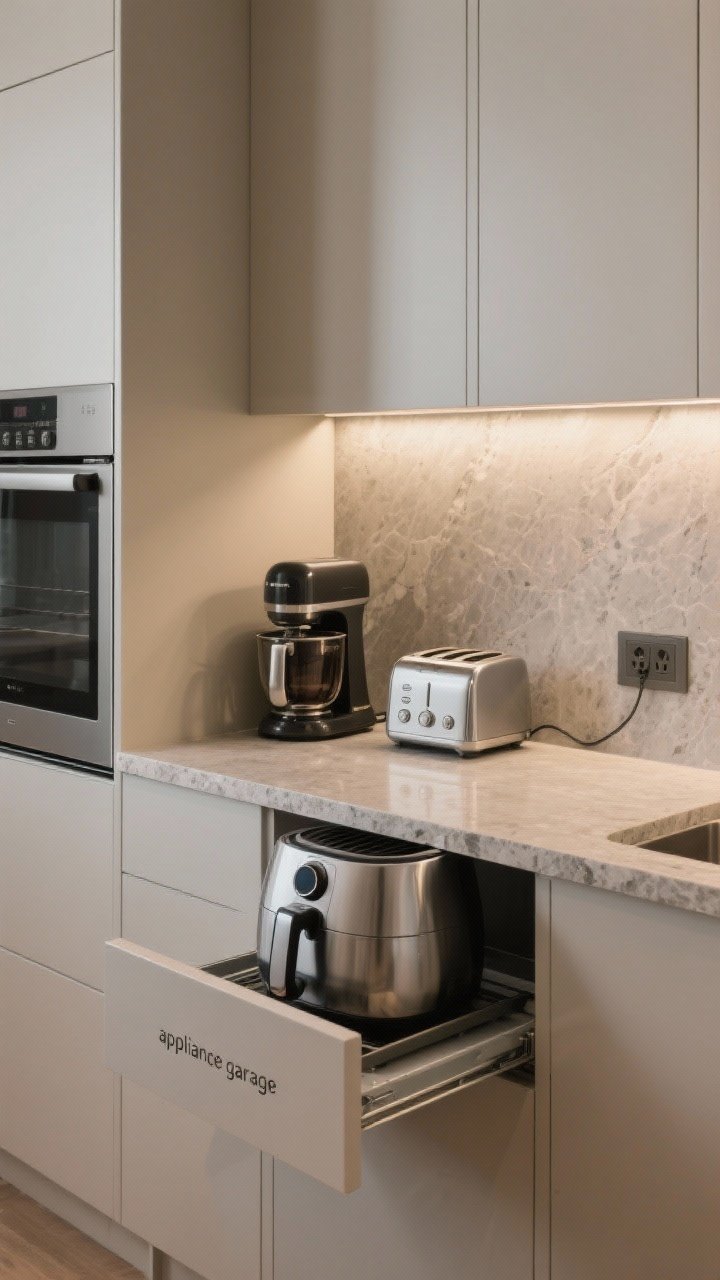
Countertop clutter kills joy. Decide what earns a permanent spot and what gets tucked away.
- Daily-use only on display: Coffee maker, toaster—maybe the blender if you’re committed.
- Appliance garage: Use a cabinet with an outlet or a lift for heavy mixers.
- Slide-out tray: For heavy items like air fryers. Your back will thank you.
14. Style Meets Storage: Trays, Baskets, and Bowls
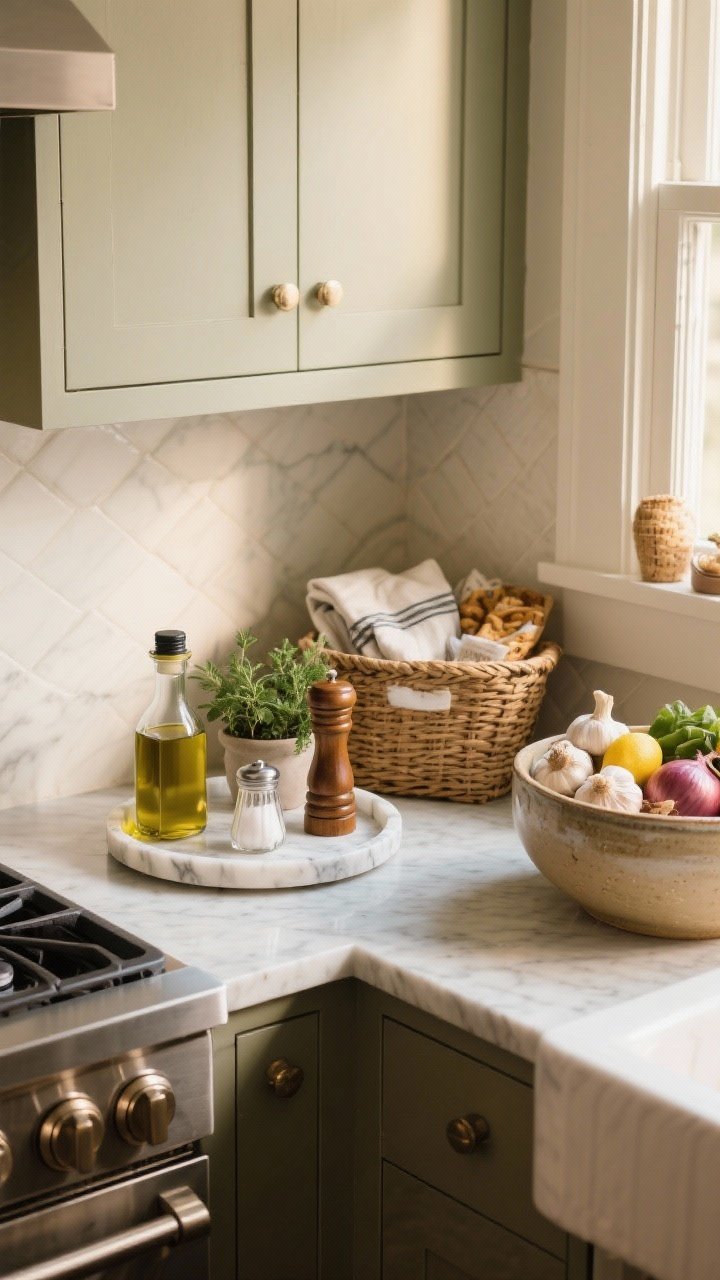
Function can be gorgeous. Use a few pretty pieces to make organization feel intentional.
- Counter trays: Corrals oils, salt, pepper, and a small plant for chef vibes.
- Woven baskets: Hide snacks, linens, or produce while adding texture.
- Large bowl by the stove: Toss in garlic, onions, and lemons—practical and pretty.
15. Maintain With Tiny Habits (The Secret Sauce)
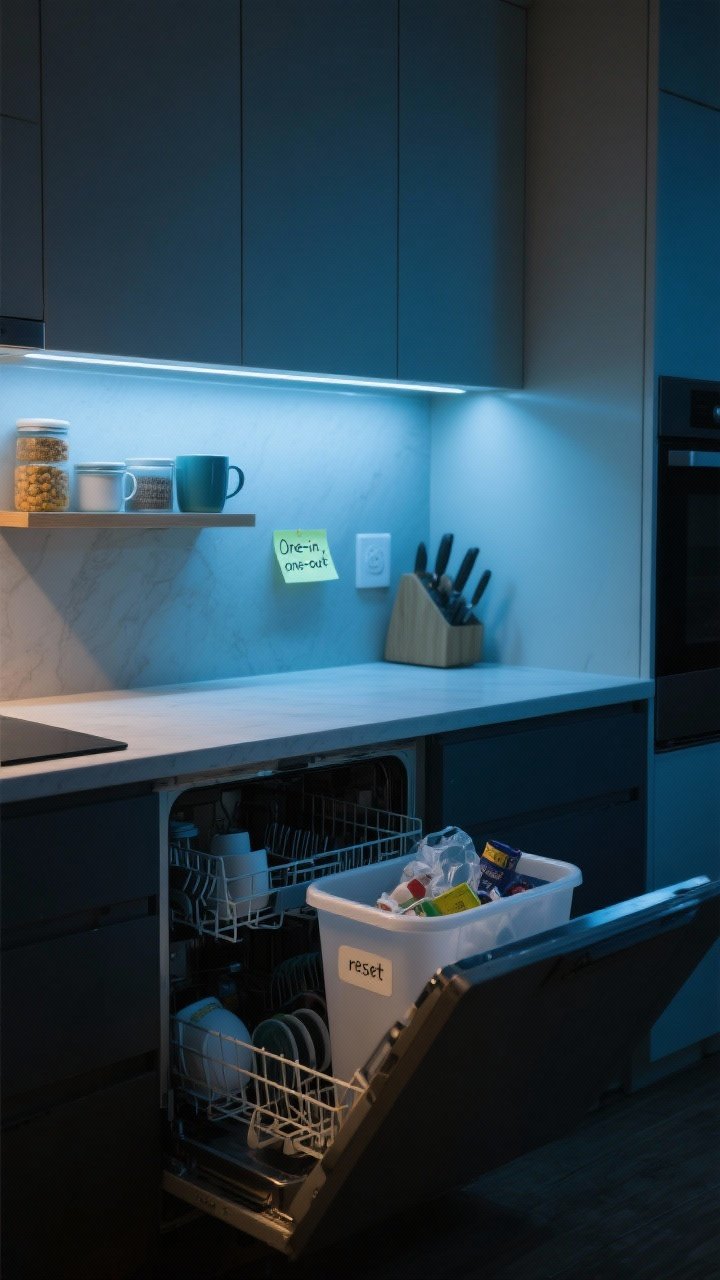
Organization isn’t a one-and-done. But tiny habits keep it from unraveling. Think two minutes, not two hours.
- One-in, one-out rule: Especially for gadgets and mugs. Yes, mugs.
- Nightly two-minute reset: Clear counters, load dishwasher, put things back in zones.
- Weekly 10-minute sweep: Toss expired items, refill containers, wipe shelves.
Pro Tip: Choose Your Anchors
Anchor your system around your routines. If you bake every Sunday, keep the baking zone prime and ready. If you meal prep, dedicate a shelf to containers and labels so Sunday you is grateful to Friday you.
Smart Shopping List to Get You Started
- Clear airtight containers (various sizes)
- Labels + chalk marker
- Expandable drawer dividers
- Lazy susans and tiered risers
- Pull-out cabinet organizers
- Magnetic knife strip and S-hook rail
- Lid organizer and small bins
That’s your blueprint for a kitchen that works as hard as you do—and looks good doing it. Start small, pick a zone, and give yourself a win today. The only thing left? Cooking something delicious in your stunningly organized space. You’ve got this.


Leave a comment